Sunday, 27 November 2011

WEEK FIFTEEN

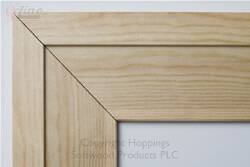
this week was spent fixing all the wall in the desired slots and screwed in place using a drill cordless drill and and posi drive then we went on to the architrave which is the  piece that goes around the edges of the windows they are all cut at 45 degrees angles and made to fit similar to the one featured
on the right


also the skirts were to be measured and cut to the right length before they were fixed how ever these were just square cuts like this one featured below these ran along the whole bottom of the sleep out and  along the tops aswell

WEEK FOURTEEN

we recieved help form the soxx team with our ceiling using the rondo steel system
like the on featured on the left notice the steel running along the inside benneath the rafters thus creating a steel  batten which the ceiling can be fixed to
after the rondo system has been applied to the ceiling in goes the insulation
which consists of R3.2
and then on top of the this will go the gib board which for the ceiling is 13mm standard
after the ceiling was in place we then used 10mm standard gib for the walls one side being standradr gid and the other being braceline
(braceline)

Monday, 14 November 2011

WEEK THIRTEEN

on this week we had to complete the exterior battens on all the certain areas and also precise cut for the window flashing using chisels tho carve out a gap to make the batten sit flush we also spent time oin the lab in preparation for the presentation that is to be due in on the 16th


                                                  this man is installing exterior battens similar to the
                                                             one we used on the sleep out

Sunday, 6 November 2011

WEEK TWELVE

on this week we did more of the exterior we used 20mm thick ply wood for the wall and put in our windows aswell we also installed the flashing which goes above all window fixings  made up of aluminium  alos we installed the ranch sliding door
simlilar to the on featured below
picture of flashing below
below is 20 mm ply wood

Sunday, 30 October 2011

WEEK ELEVEN

this week was a short week we started on a tuesday and help the sox fix there rear exterior wall which was made up of colour steel iron we had to first put in the flashing on the bottom of rear wall on the exterior side then we had to measure the distance of  in which we had to fix the 100mm hex head screws makis ure the iron was at the right hieght we maintianed thios by using a 20mmm packer underneath every sheet of iron put on after al the sheets for the exterior rear wall ahad gone up we went on to fixing the iron for the roof before we did this we had measure the distance of every perlin once we had that we had to drill the roof with the required distances then a black sheet was layed down and fixed to the top of the rafters with cloud nails once the black sheet was pinned to the rafters we used the iron sheets and fixed it in place with a 50mm overhang on the front and drilled it to the rafters using the same 100mm  hex head screws that we used on the rear exterior wall

Thursday, 20 October 2011

WEEK TEN

This was the last week for the term it was mainly spent on touching up the soft fit nogs and measuring out the wall cladding for the wall of the sleepout we had to cut the angle from the roof to match up with the wall cladding so it was able to fit and not have any over hang or gaps between the cladding  a big clean up was put into progress at the end of the week

WEEK NINE

on this day we started the day back on site completing the nogs for the soft fit area the soft fit area is located at the end of the rafters towards the front of the sleep out the nogs are put in place there to provide  a platform in which nails can be driven into these nails will fix the fibre lite to the nogs after it has been slide in to place on the fascia board . a fascia is a board which caps of the ends of the rafters and are gennerally put into place for the purpose housing the spouting system and to add a better touch to the fly rafter which is located directly underneath we also startted the cavity battens system which consisted of a breather sheet attached the purpose of the breather sheet is to ensure that the most minimal water gets through once the braether sheet has been applied it is must then be cut at certain areas such as the opennings for windows and sliding doors .